
Shaping is where your sourdough dough turns from a sticky blob into a loaf with real structure. Good shaping builds surface tension, which helps your bread rise tall in the oven, hold a neat outline, and open beautifully along the score. Poor shaping usually leads to flat, spreading loaves, even when your starter and fermentation are spot on. Fortunately, shaping is a skill anyone can learn with a few practice bakes. This guide covers the two most popular shapes, the round boule and the oval batard, with step by step hand position photos from experienced home bakers. You will learn how to preshape, how to create tension without tearing the dough, and how to move your loaf into a banneton cleanly. Read through each step before you start, keep a bench scraper nearby, and remember that slightly imperfect loaves still taste amazing. Let us get your hands into the dough.

Photo credit: Make It Dough
Before You Shape
- Finish bulk fermentation until the dough is airy and jiggly
- Lightly flour your counter and banneton
- Keep a bench scraper and a small bowl of water nearby
- Work with confident, gentle movements
How to Shape a Boule
Step 1, Turn Out the Dough

Photo credit: Make It Dough
Tip your dough onto a lightly floured surface with the smooth top facing down. Let it relax for a moment so it spreads slightly.
Step 2, Preshape Into a Round

Photo credit: Make It Dough
Use a bench scraper to tuck the edges under and form a loose round. Rest it for 20 to 30 minutes, uncovered, until it relaxes again.
Step 3, Fold the Edges In

Photo credit: Make It Dough
Flip the round over, then fold the bottom third up toward the middle. Continue around the dough, folding each side into the center like closing an envelope.
Step 4, Flip and Round

Photo credit: Make It Dough
Turn the dough seam side down. Cup your hands around it and pull it toward you in short strokes so the surface tightens.
Step 5, Build Tension
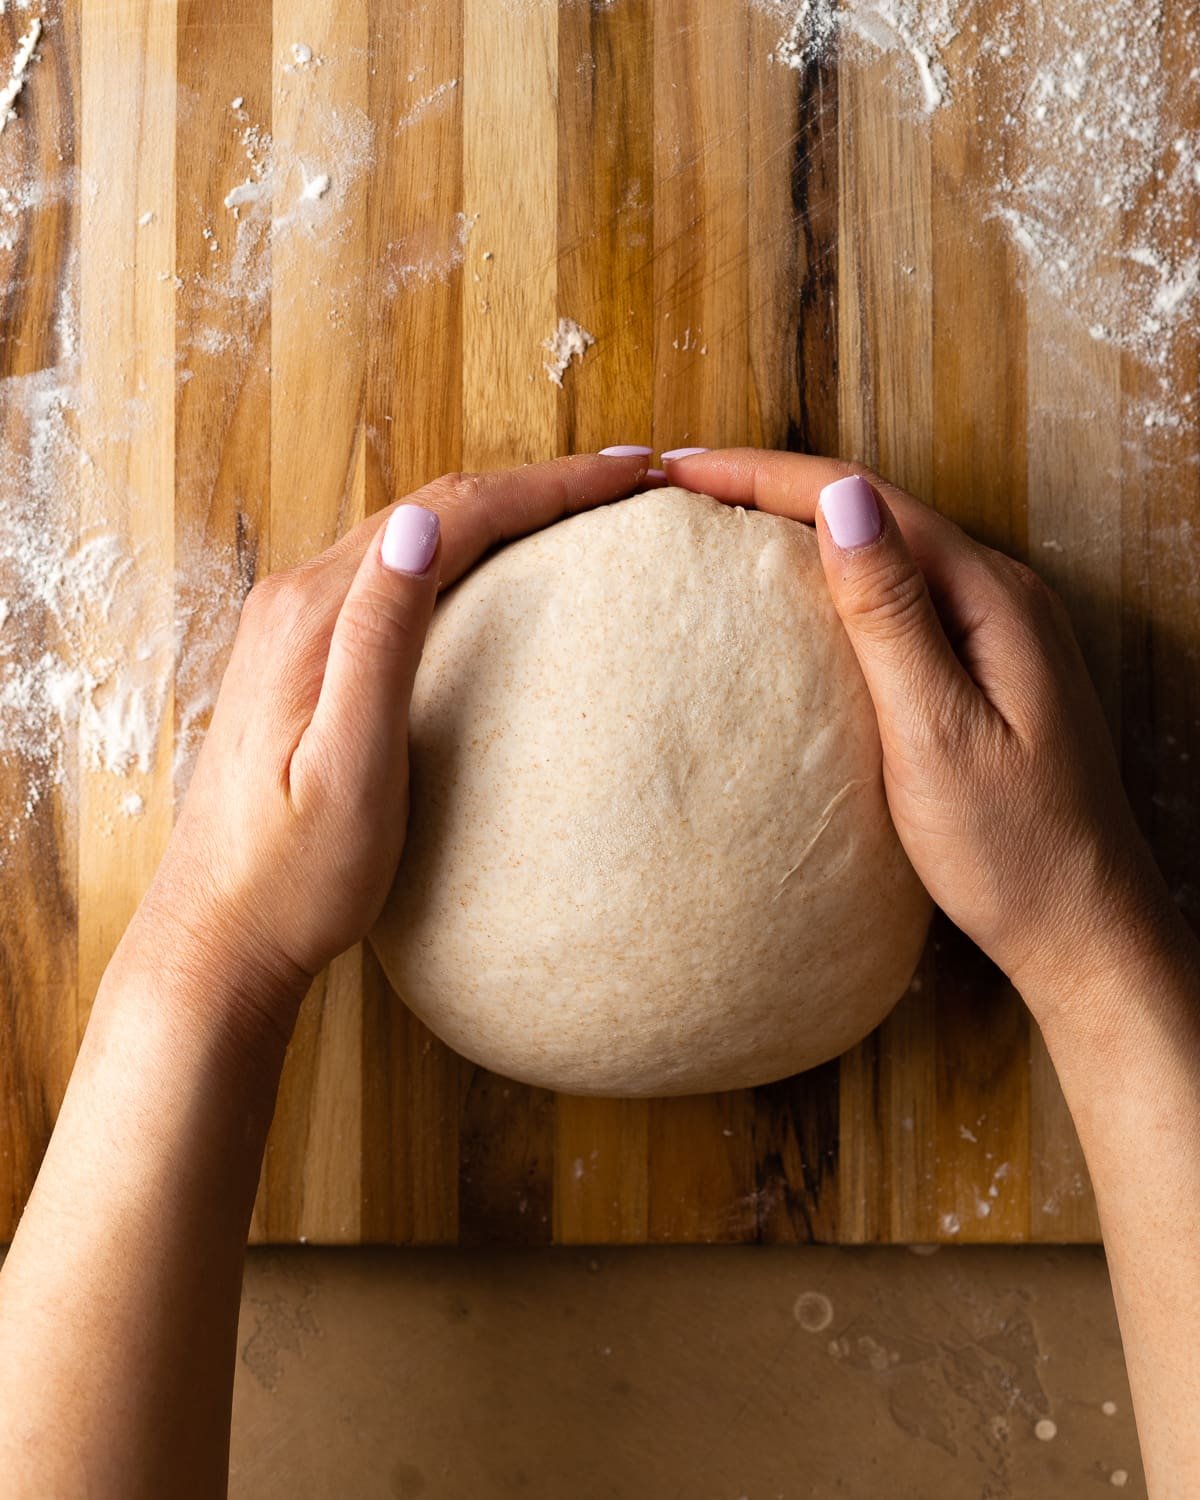
Photo credit: Make It Dough
Rotate and drag a few more times until the top feels smooth and taut. Stop once the dough holds a tall round shape on its own.
Step 6, Move It to the Banneton
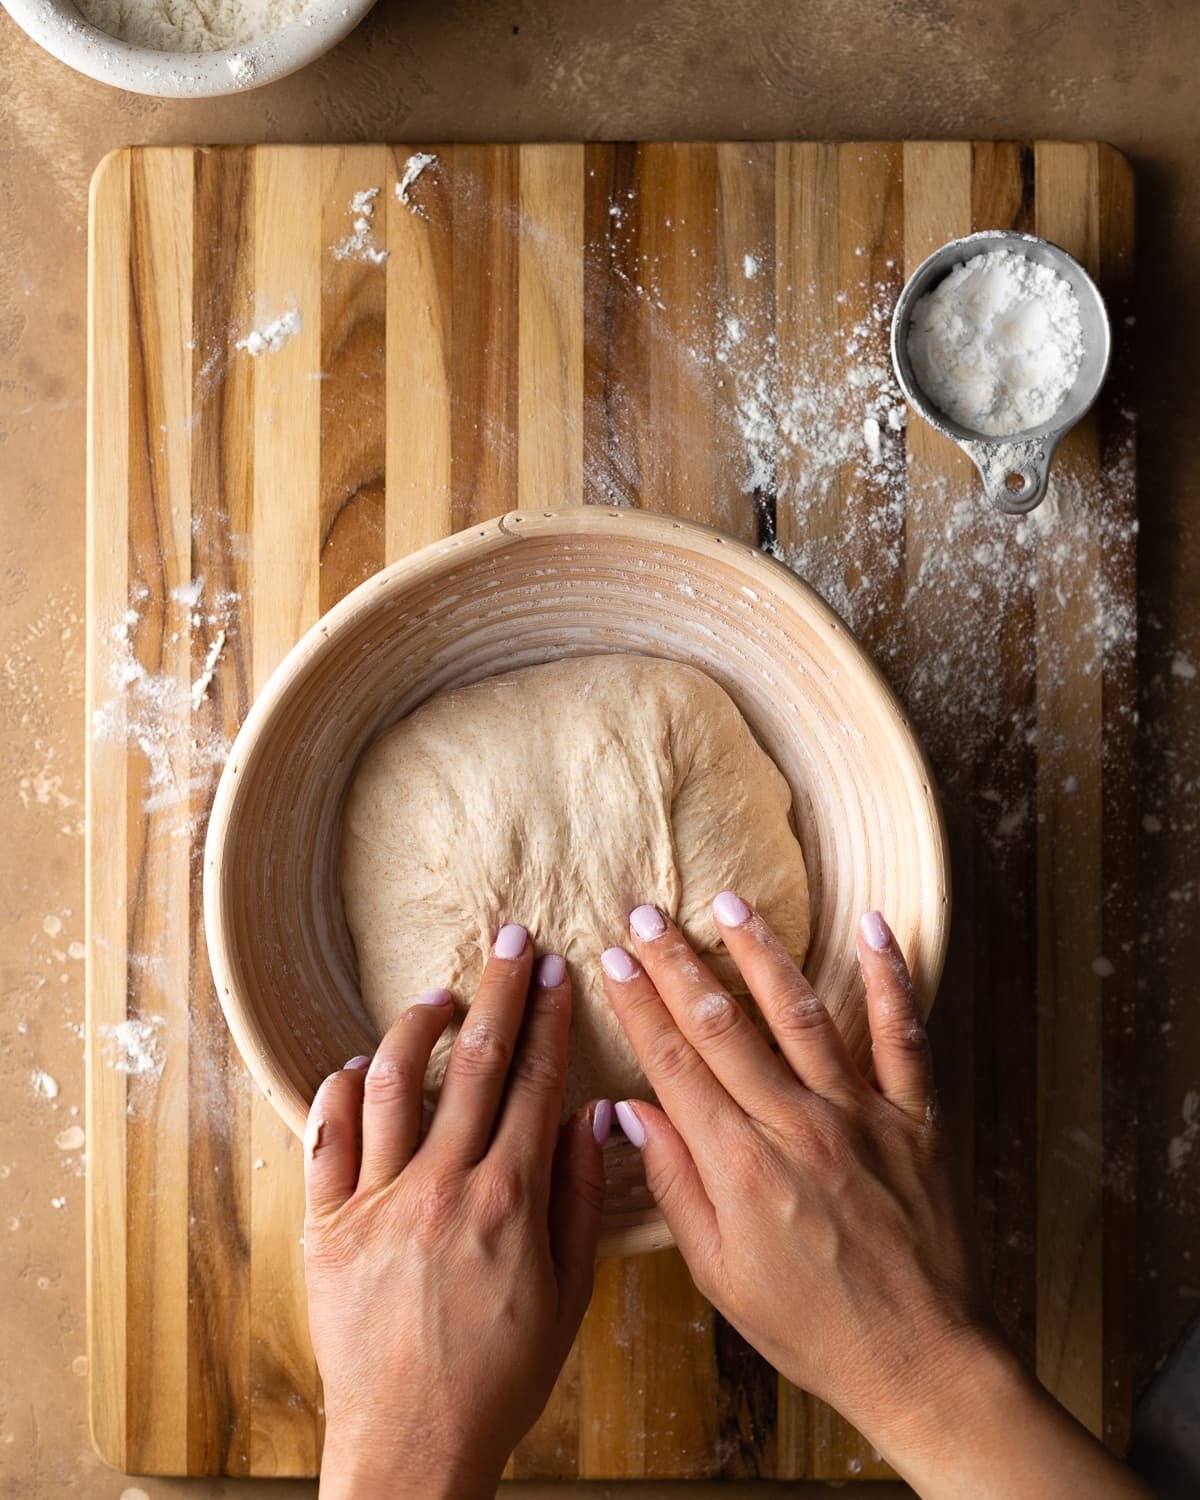
Photo credit: Make It Dough
Lift the dough with your scraper and set it seam side up in a floured banneton. Pinch or stitch the seam closed, then cover and chill overnight.
How to Shape a Batard
Step 1, Stretch Into a Rectangle
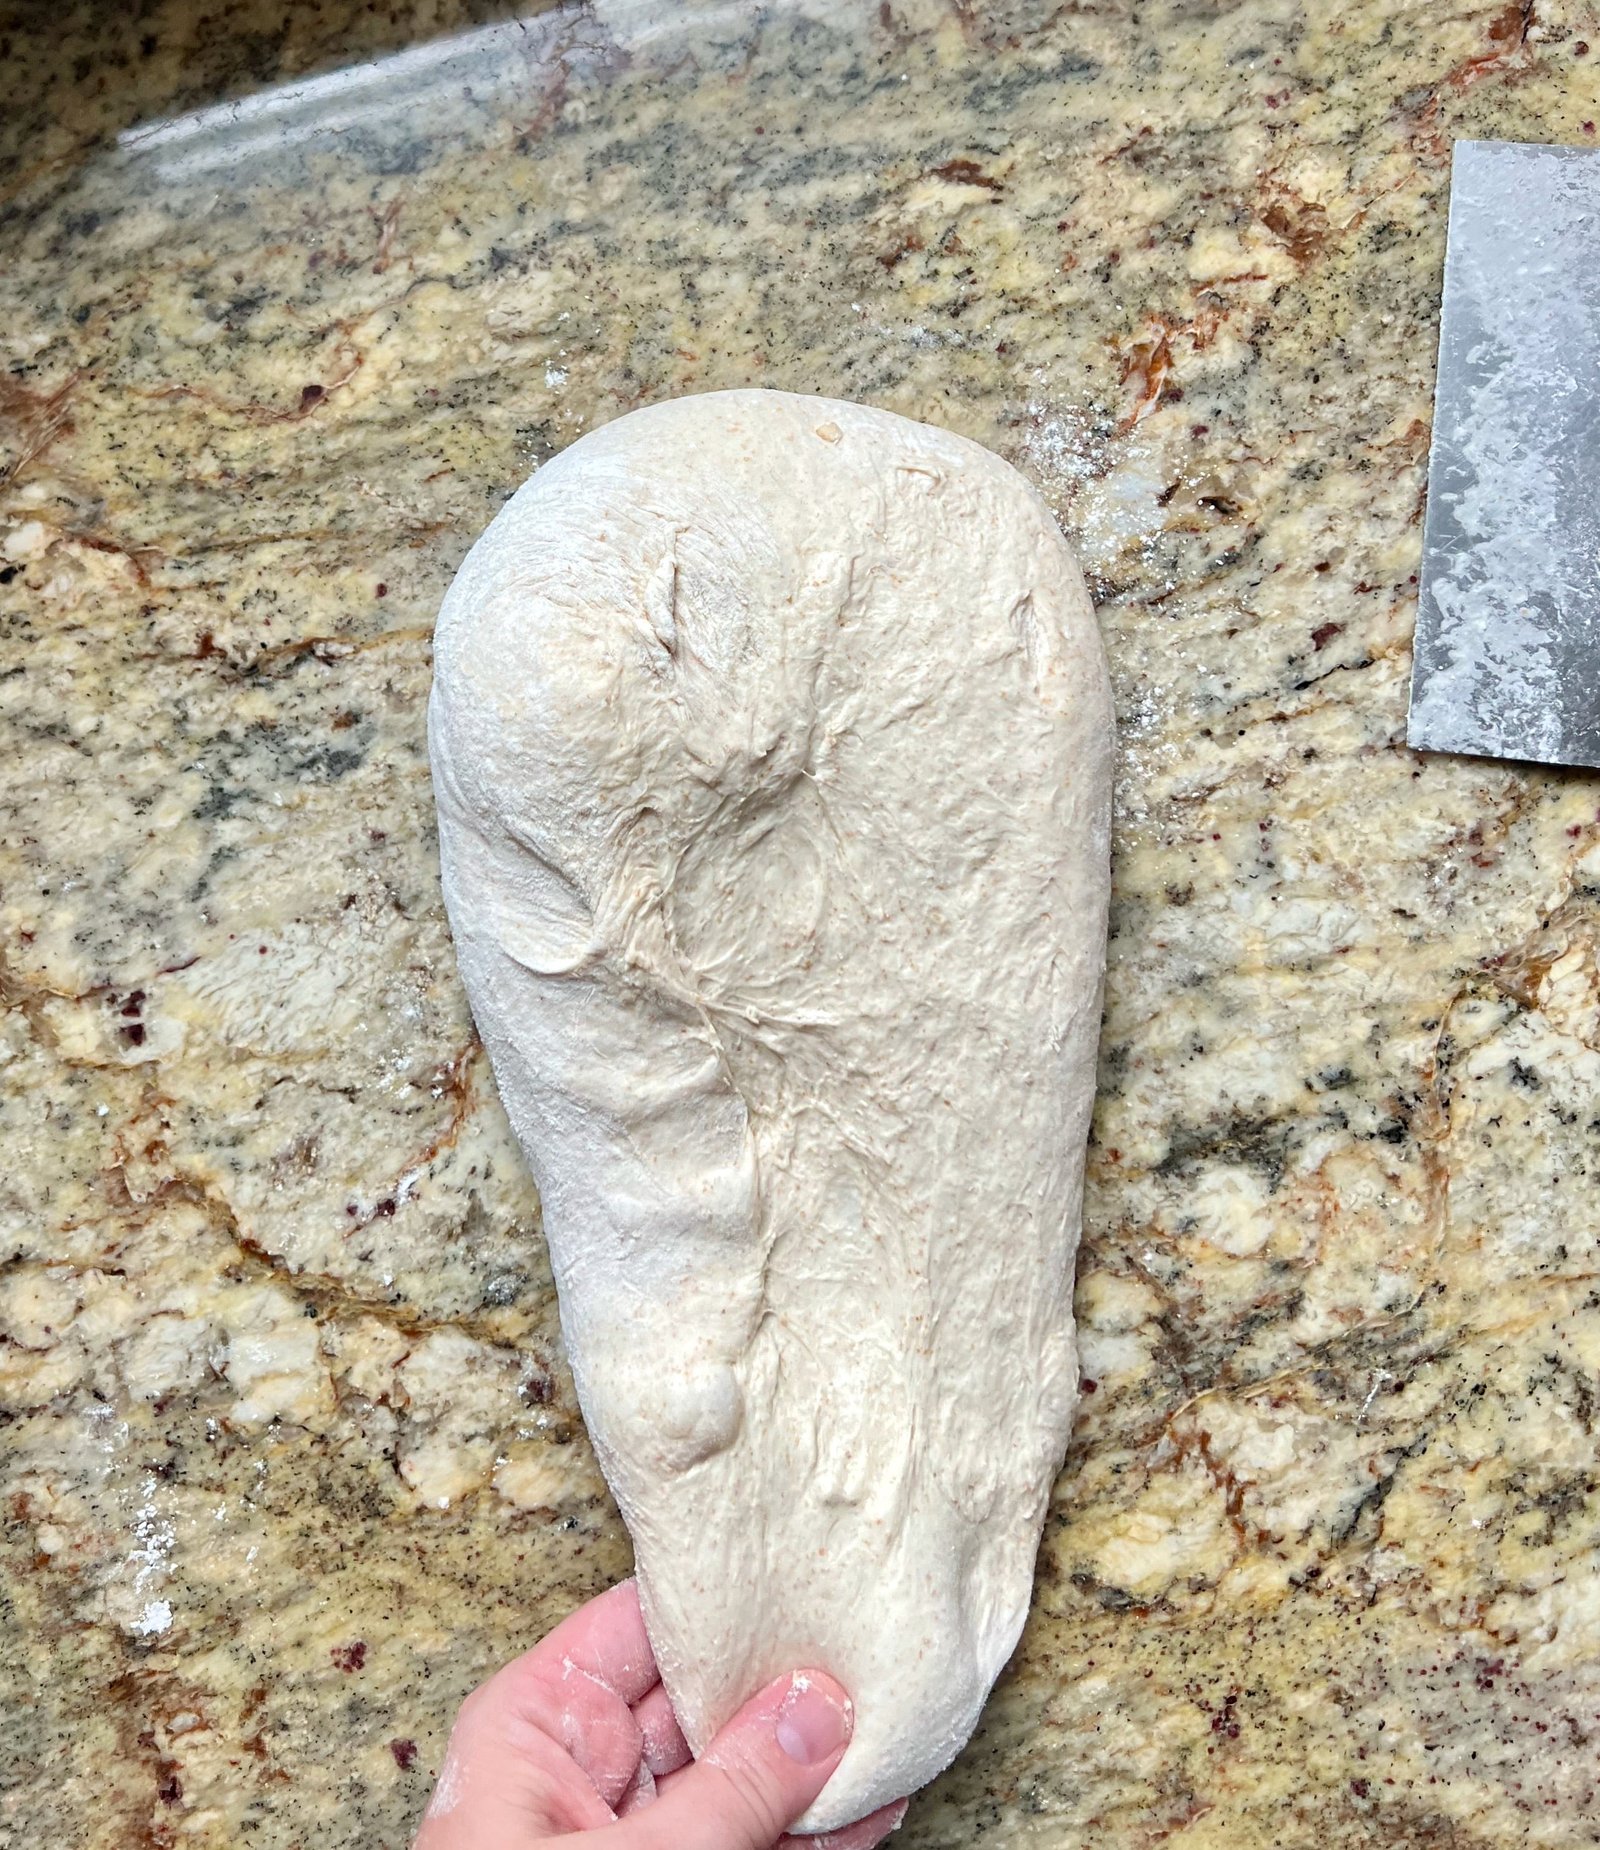
Photo credit: Amy Bakes Bread
Flip your preshaped round onto a floured surface. Gently stretch it into a rough rectangle without pressing out all the air.
Step 2, Fold the Sides
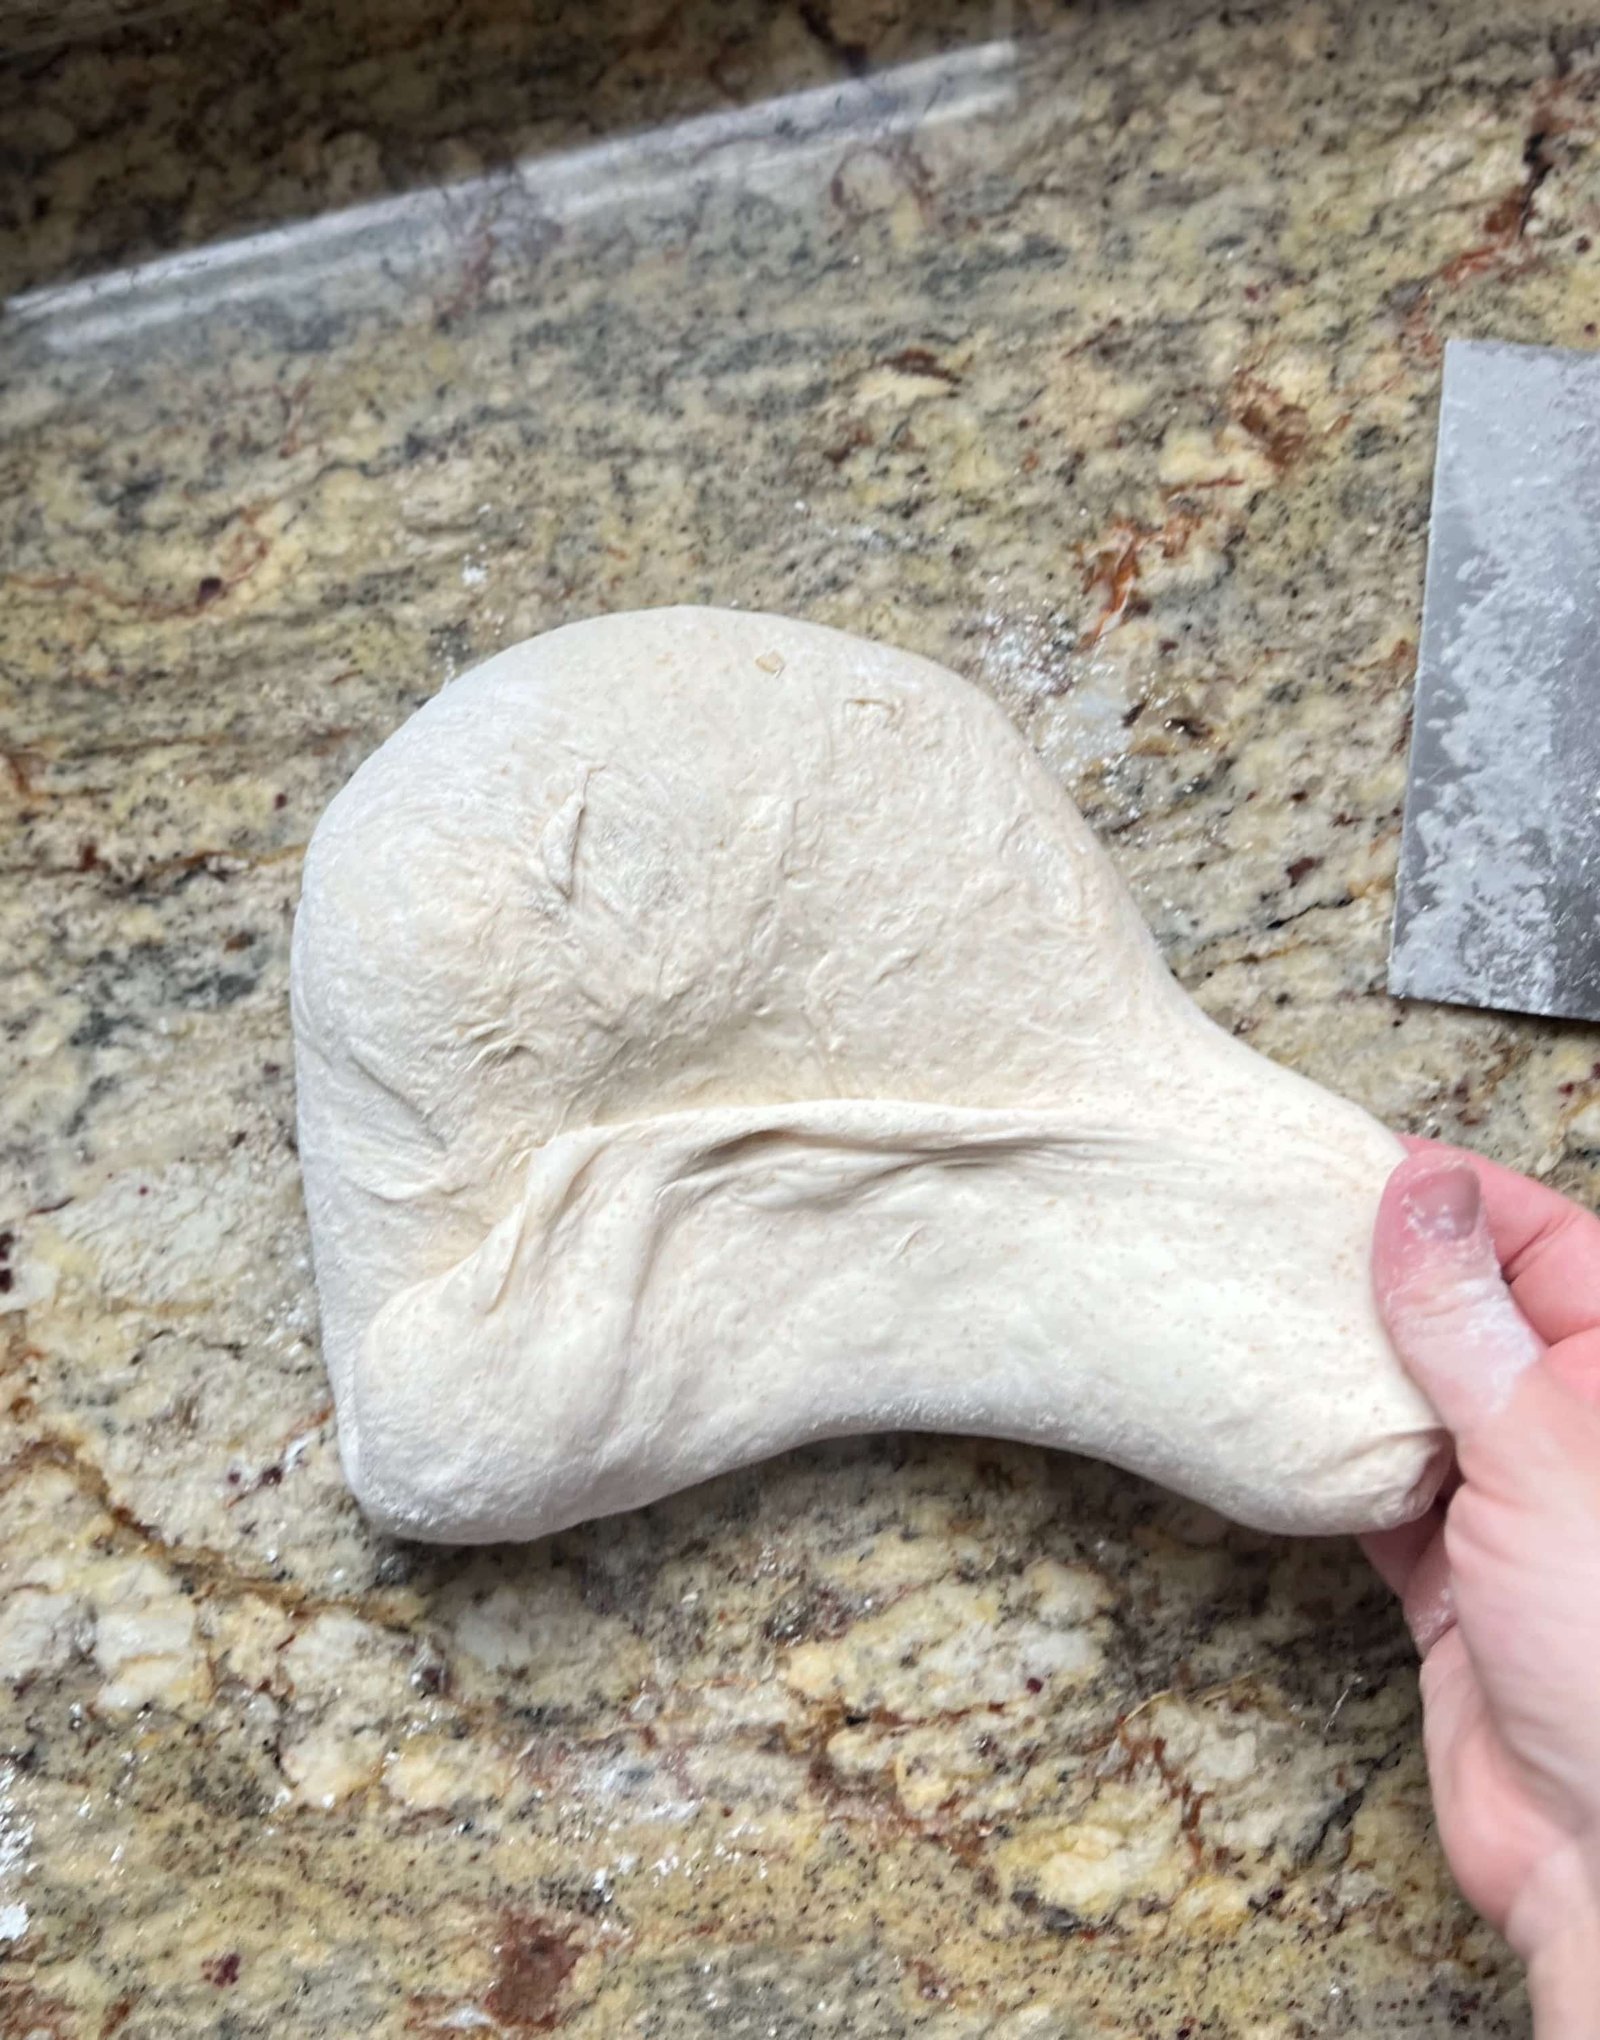
Photo credit: Amy Bakes Bread
Pull one side out and fold it across the middle. Repeat with the opposite side so the folds overlap slightly.
Step 3, Fold the Top Down
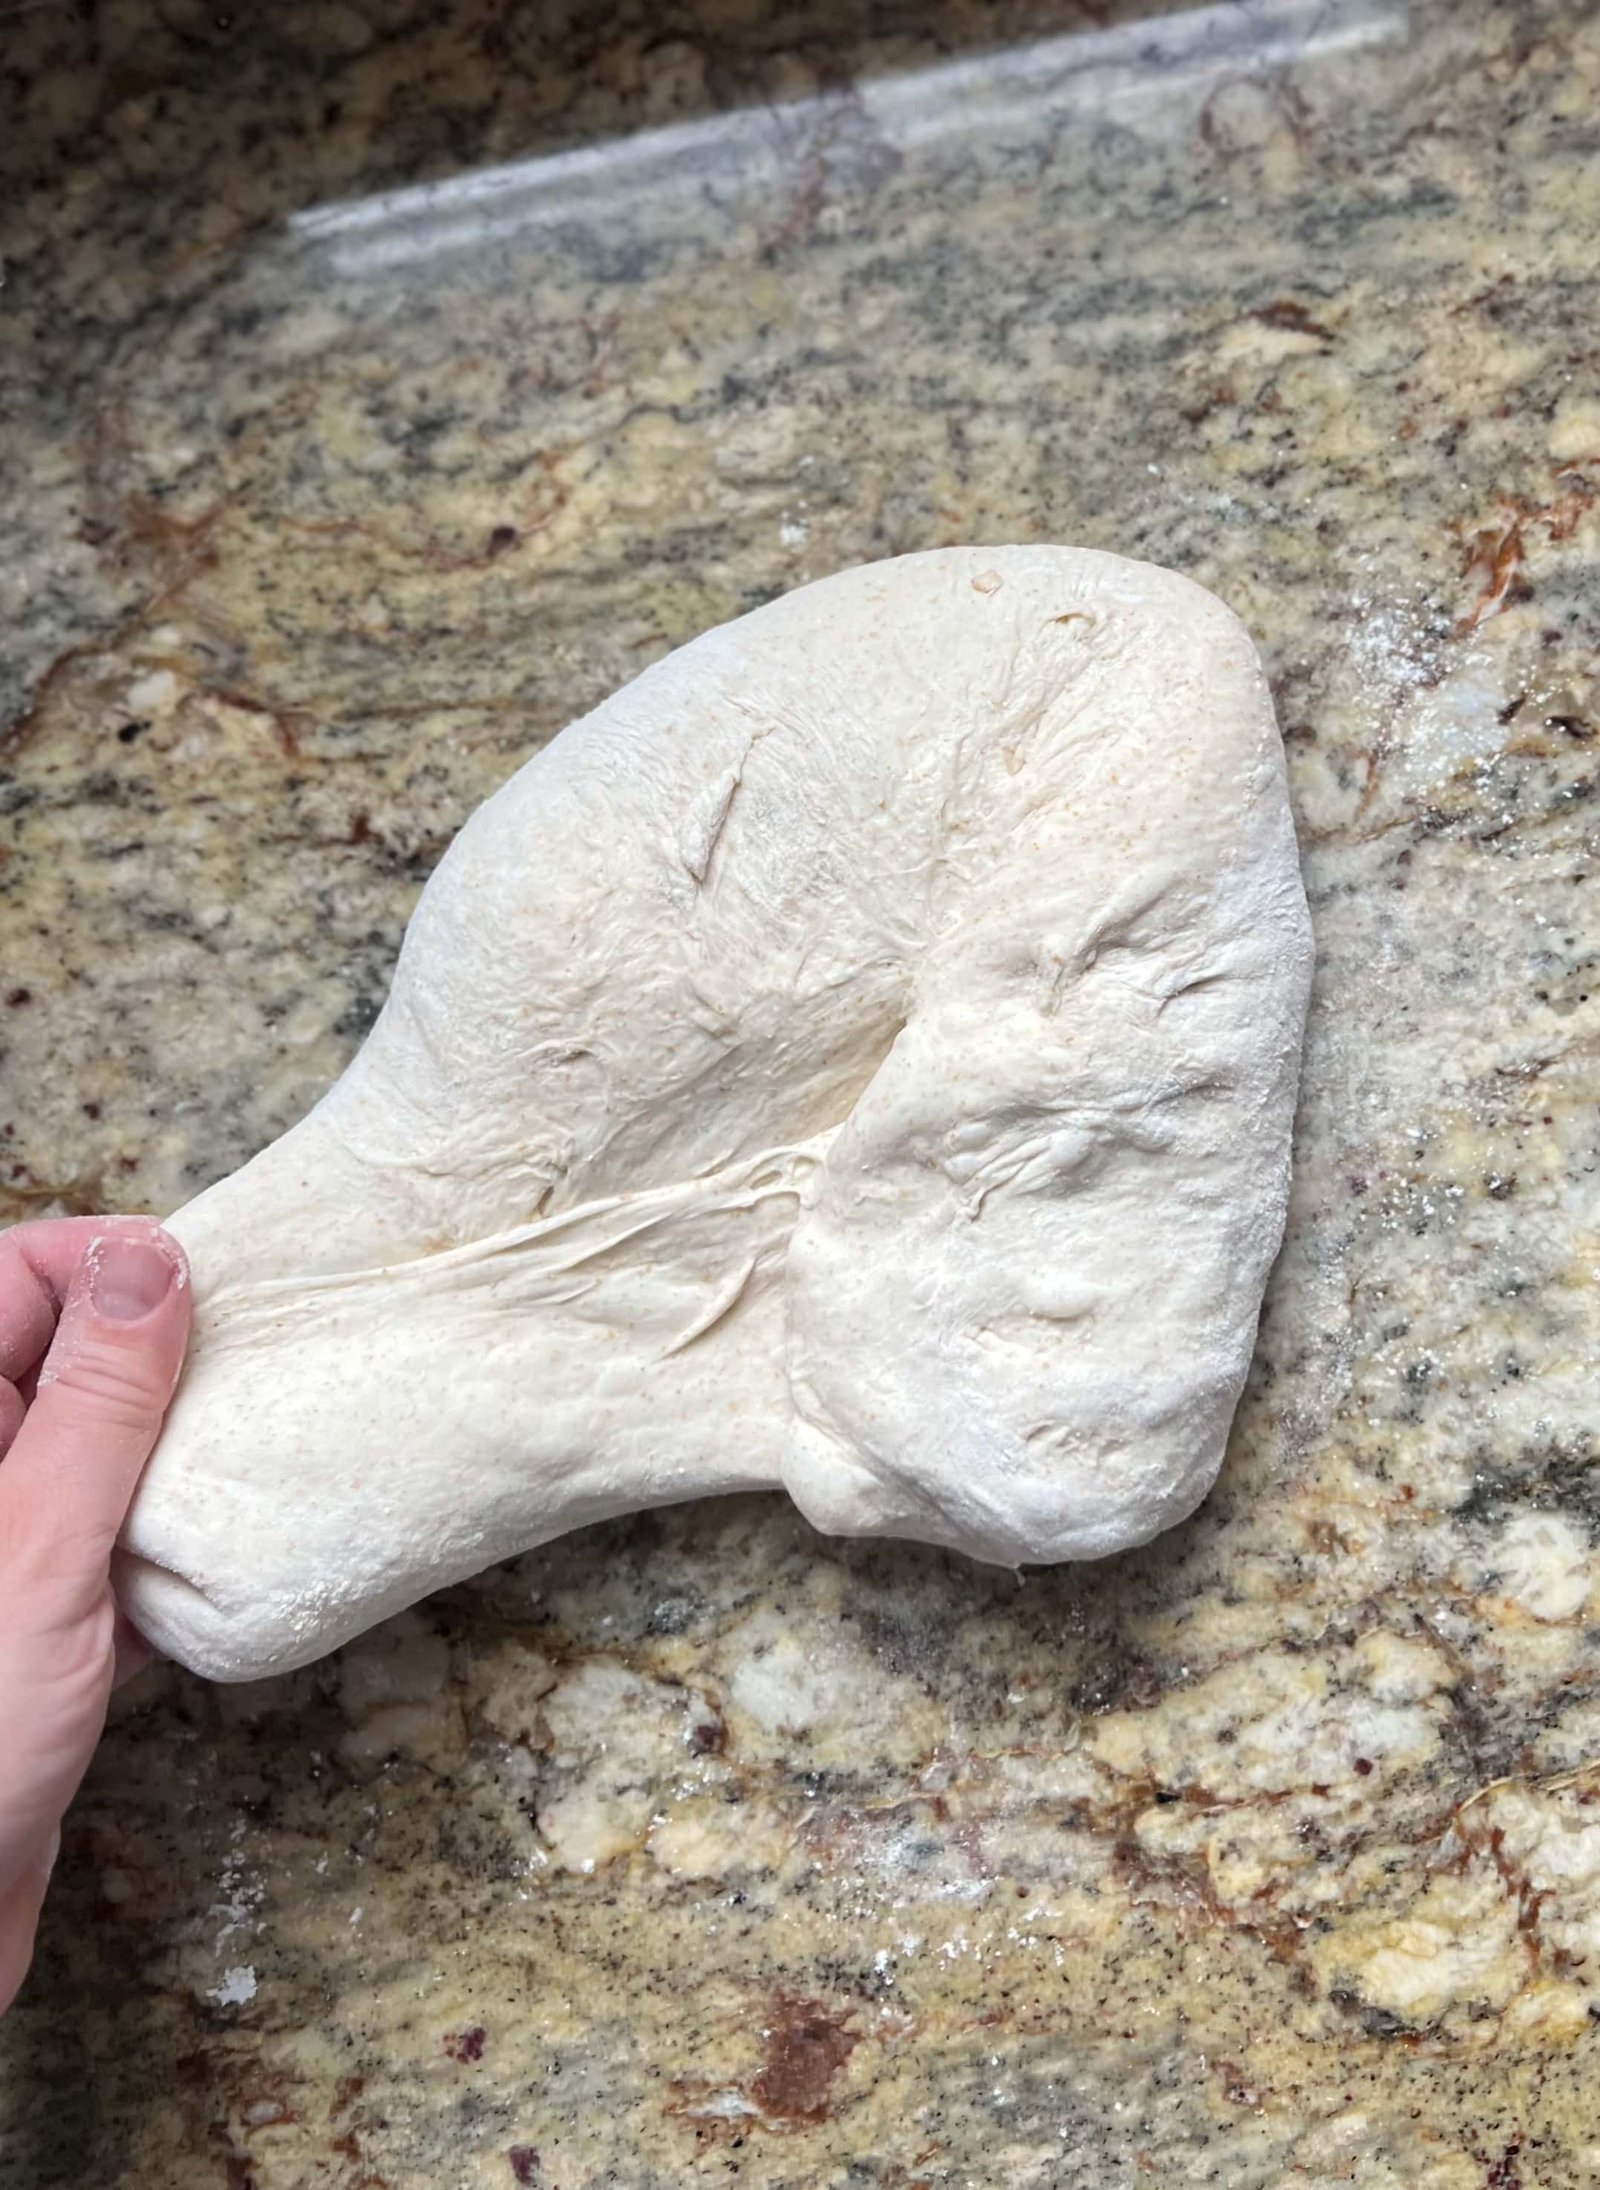
Photo credit: Amy Bakes Bread
Bring the top edge down toward the center and press lightly to seal. Now your dough should look like a narrower rectangle.
Step 4, Roll It Up

Photo credit: Amy Bakes Bread
Starting at the top, roll the dough toward you, pressing each turn gently with your thumbs to build tension along the length.
Step 5, Seal and Tighten

Photo credit: Amy Bakes Bread
Pinch the seam closed and roll the loaf back and forth a few times. Taper the ends slightly for a classic oval.
Step 6, Proof in an Oval Banneton

Photo credit: Make It Dough
Place the batard seam side up in a floured oval banneton. Cover and refrigerate overnight for easier scoring and better flavor.
Shaping Troubleshooting
- Dough sticks to your hands, so use less flour and wet fingers
- Dough tears on top, so stop shaping sooner
- Loaf spreads in the oven, so build more tension next time
- Seam opens while baking, so pinch it firmly before proofing
Wrapping Up
Shaping takes a little practice, but every loaf teaches your hands something new. Start with a boule, then try a batard once you feel comfortable. Ready to bake one? Follow our easy sourdough bread recipe and pin this guide for your next shaping session.
Do you prefer shaping a boule or a batard? Tell us in the comments below!