
Baking your first loaf of sourdough feels like a big milestone, and it should. With just flour, water, salt, and an active starter, you can make a crackly, golden loaf with an open, chewy crumb that beats anything from the store. This easy sourdough bread recipe breaks the process into simple steps with photos, so you always know what your dough should look like. Most of the time is hands off while the dough rises on its own, which makes it easy to fit around your day. You will mix the dough, build strength with gentle stretch and folds, let it rise, shape it, chill it overnight, and bake it in a hot Dutch oven. Nothing here needs fancy equipment or years of practice. Once you bake this loaf a few times, you will understand how sourdough behaves and feel confident trying new flavors. Ready to bake? Grab your bubbly starter and let us begin.

Photo credit: Homegrown Happiness
Ingredients
- 500 grams bread flour
- 350 grams warm water
- 100 grams active, bubbly sourdough starter
- 10 grams fine sea salt
Equipment
- Large mixing bowl
- Kitchen scale
- Banneton or towel lined bowl
- Dutch oven or cast iron pan with lid
- Razor blade or bread lame
Step 1, Mix the Dough
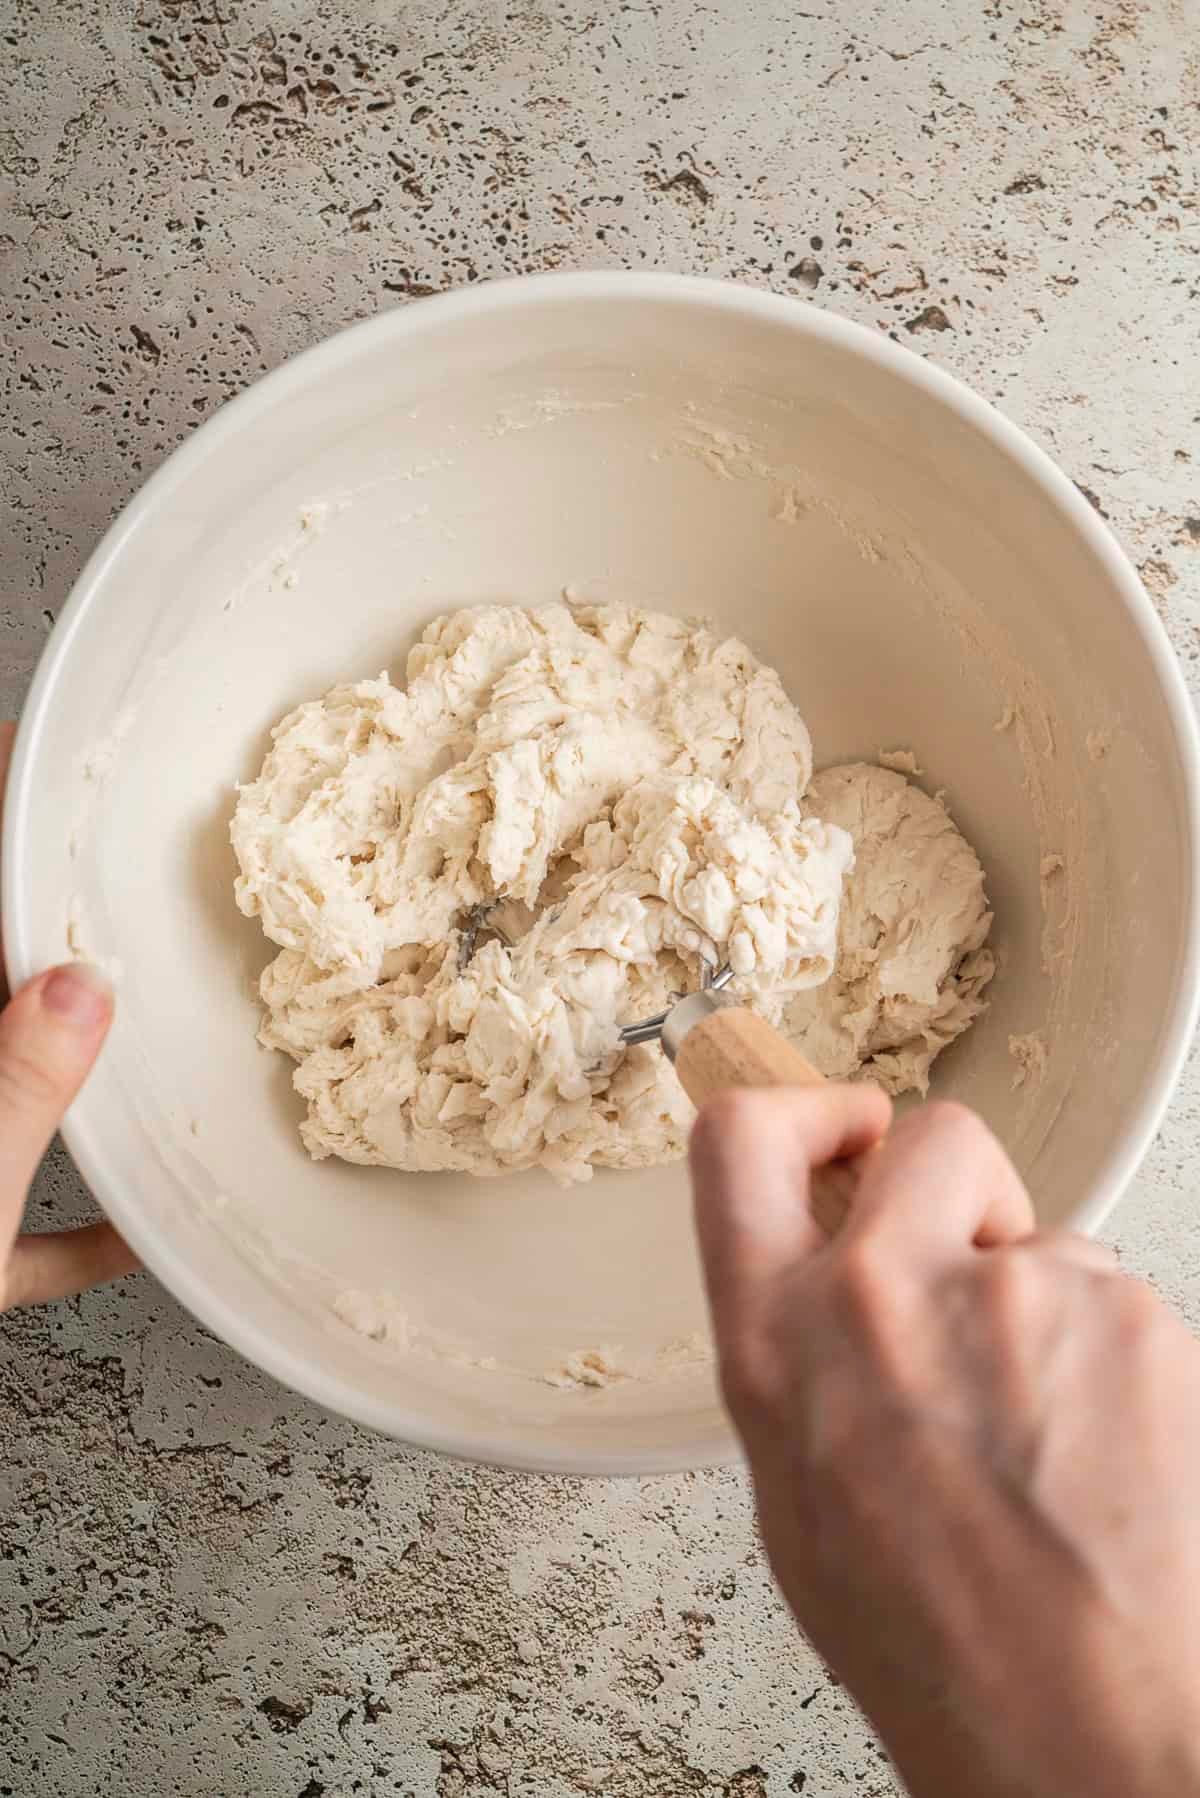
Photo credit: Homegrown Happiness
Stir your starter into the warm water, then add the flour and mix until no dry spots remain. Cover and rest for 30 to 60 minutes so the flour can fully hydrate.
Step 2, Add the Salt
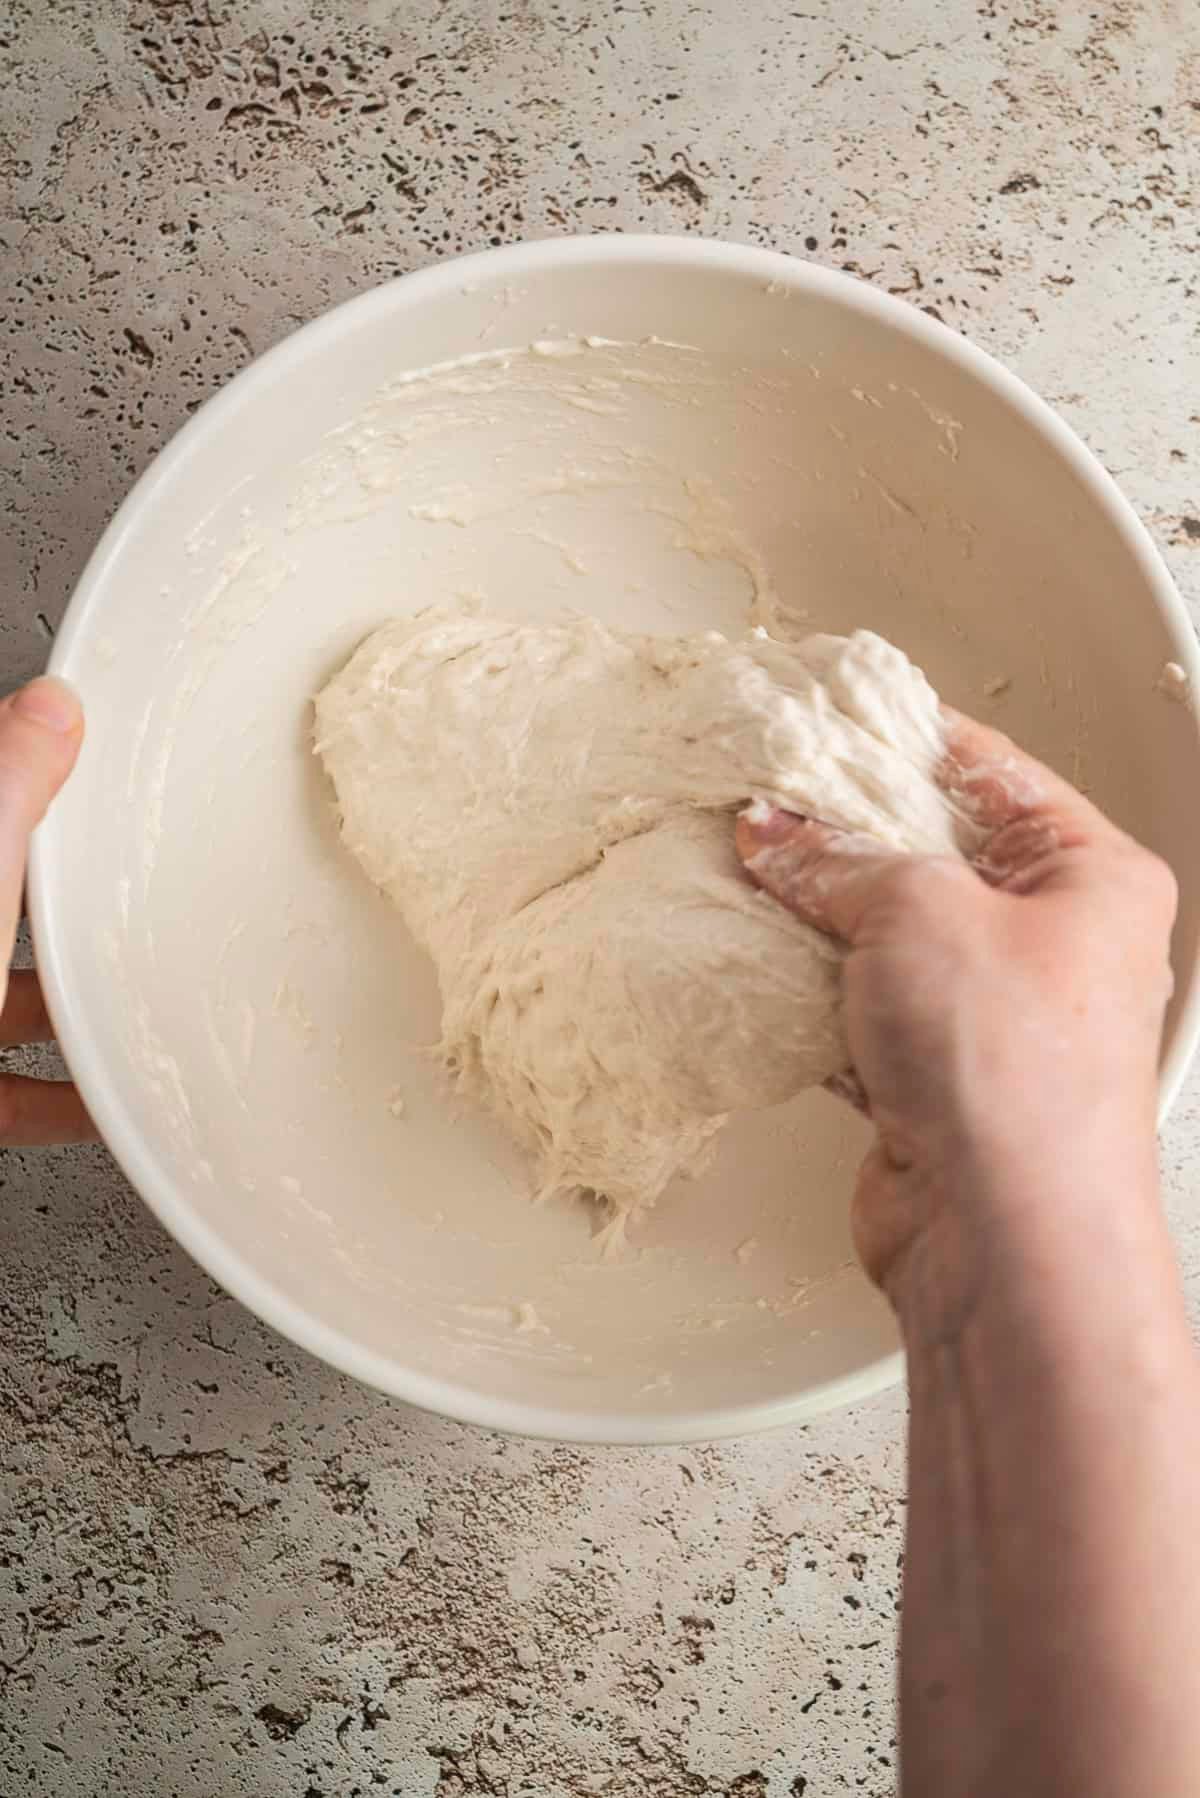
Photo credit: Homegrown Happiness
Sprinkle salt over the dough with a splash of water and squeeze it through with wet hands. Expect the dough to feel shaggy and sticky right now.
Step 3, Stretch and Fold
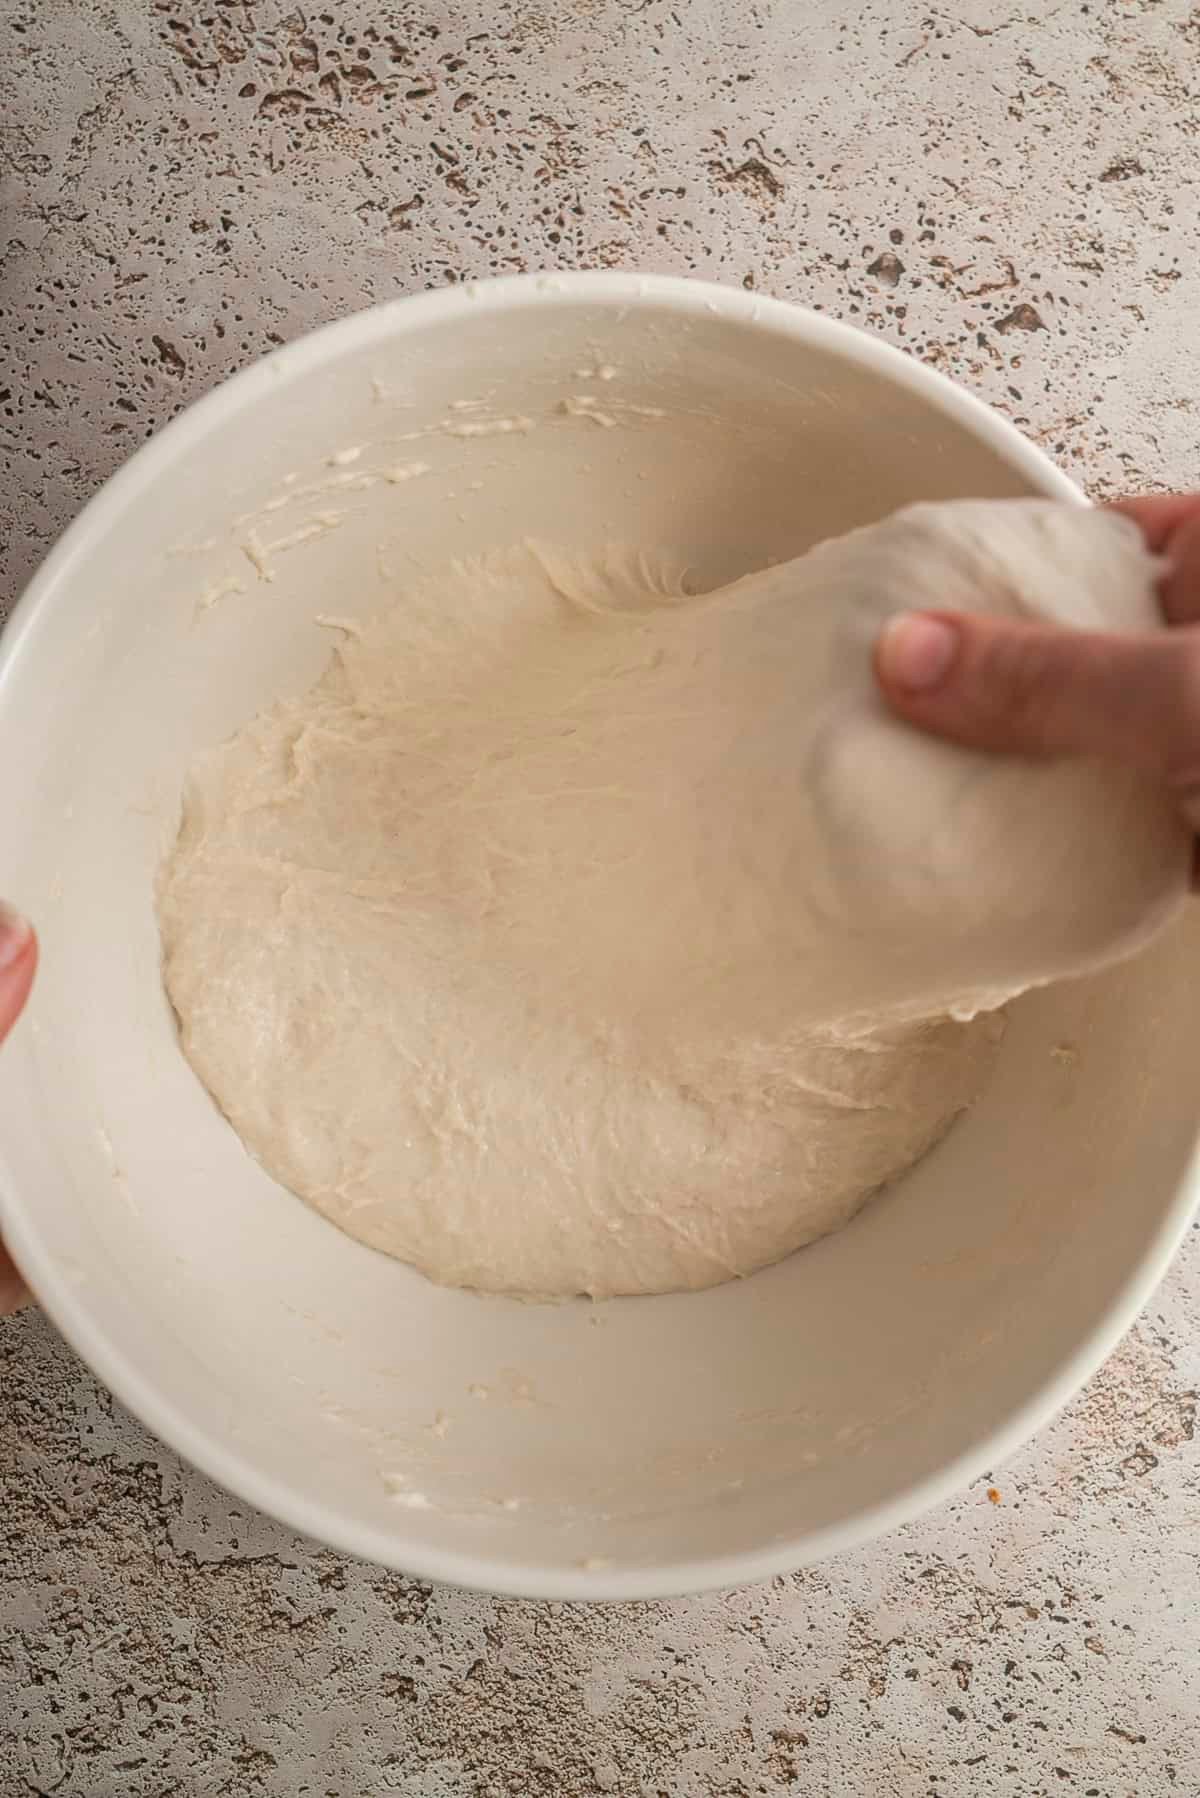
Photo credit: Homegrown Happiness
Every 30 minutes for two hours, grab one side of the dough, stretch it up, and fold it over itself. Rotate the bowl and repeat on all four sides.
Each round makes your dough smoother and stronger, which helps your loaf hold its shape.
Step 4, Bulk Rise

Photo credit: Homegrown Happiness
Cover the bowl and let the dough rise at room temperature until it grows about 50 to 75 percent. Look for a domed, jiggly surface with bubbles along the sides.
Warm kitchens may need four hours, while cool ones can take eight or more.
Step 5, Preshape

Photo credit: Homegrown Happiness
Turn the dough onto a lightly floured counter and gently fold it into a loose round. Rest it uncovered for 20 minutes so the gluten can relax.
Step 6, Final Shape

Photo credit: Homegrown Happiness
Fold the edges toward the center, flip it seam side down, and drag it toward you to build tight surface tension. Your dough should hold a neat, round shape.
Step 7, Cold Proof Overnight

Photo credit: Homegrown Happiness
Place the dough seam side up in a floured banneton, cover it, and refrigerate for 8 to 16 hours. Chilling deepens flavor and makes scoring much easier.
Step 8, Score
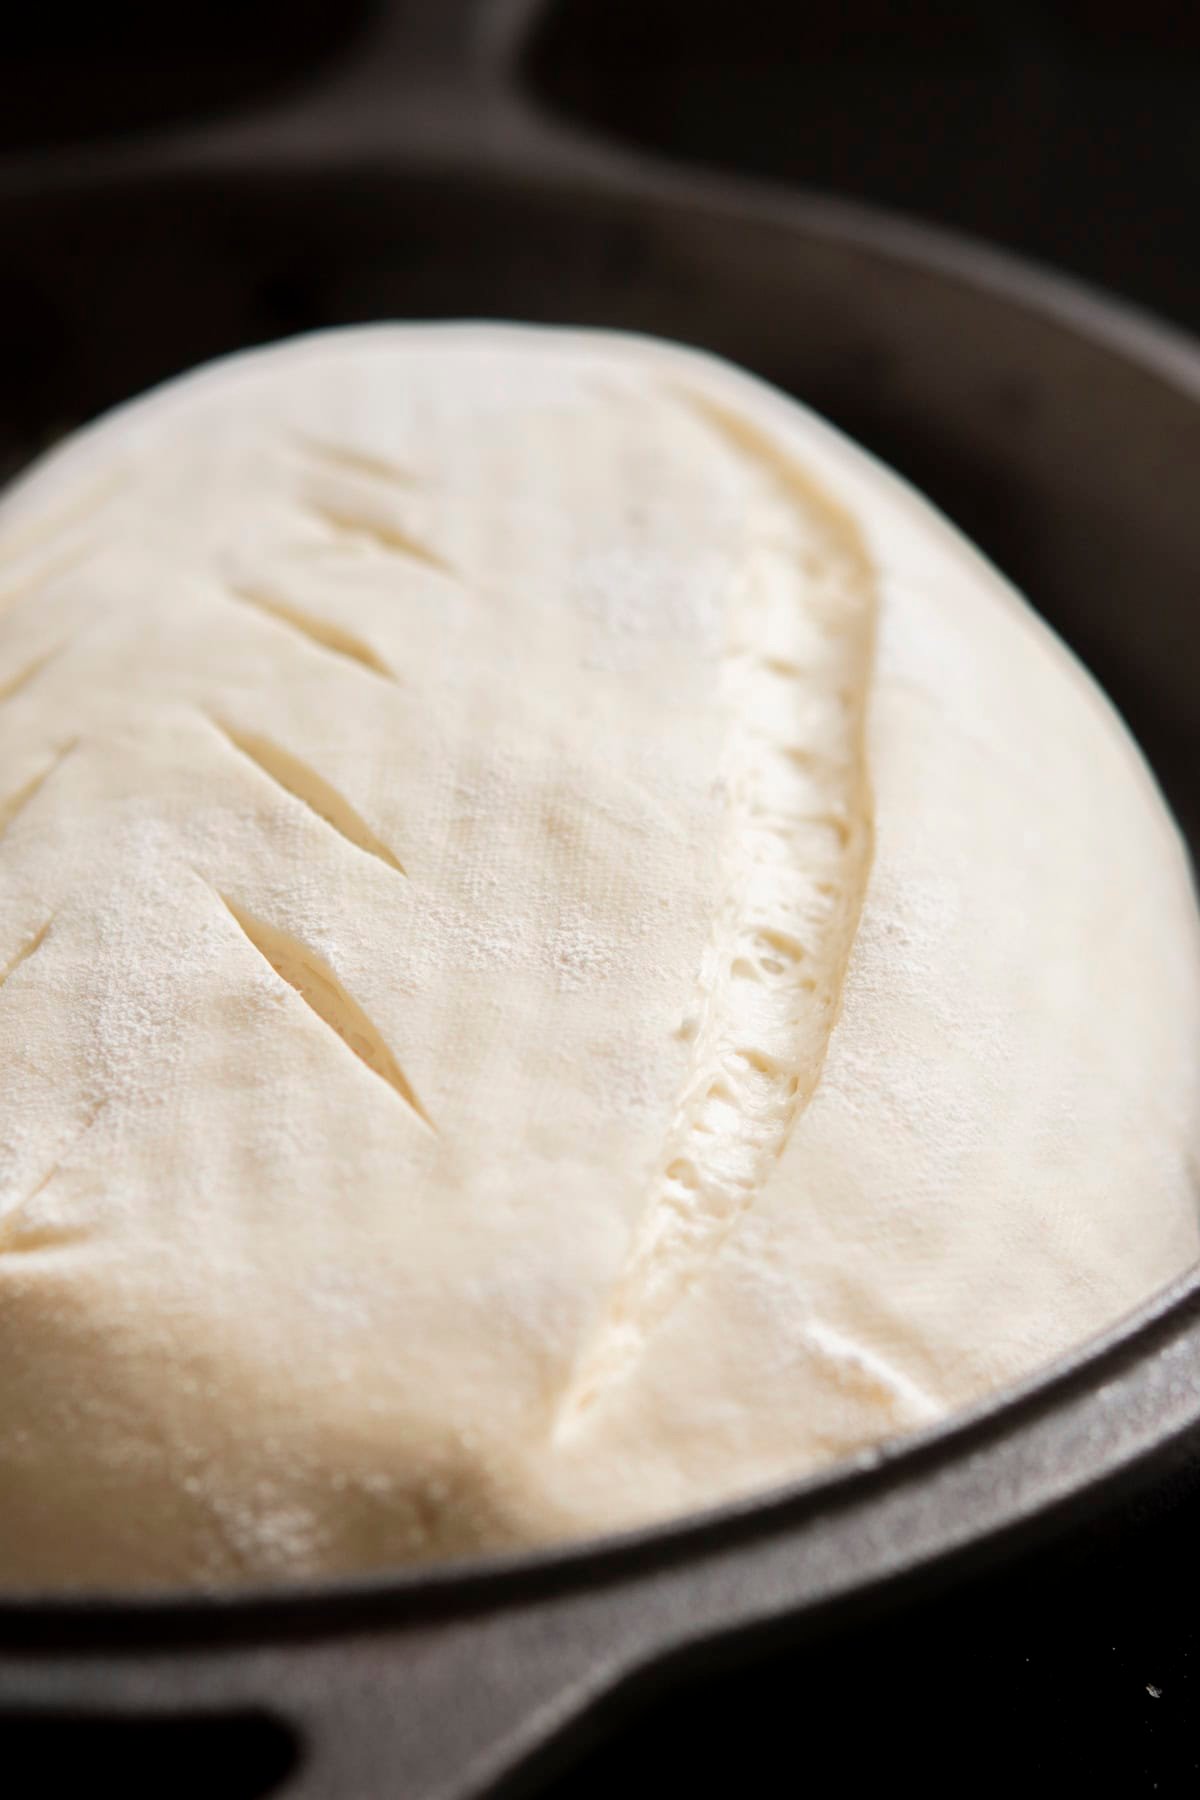
Photo credit: Homegrown Happiness
Preheat your oven and Dutch oven to 475 degrees Fahrenheit for 45 minutes. Turn the cold dough onto parchment and make one deep slash with a razor blade.
Step 9, Bake
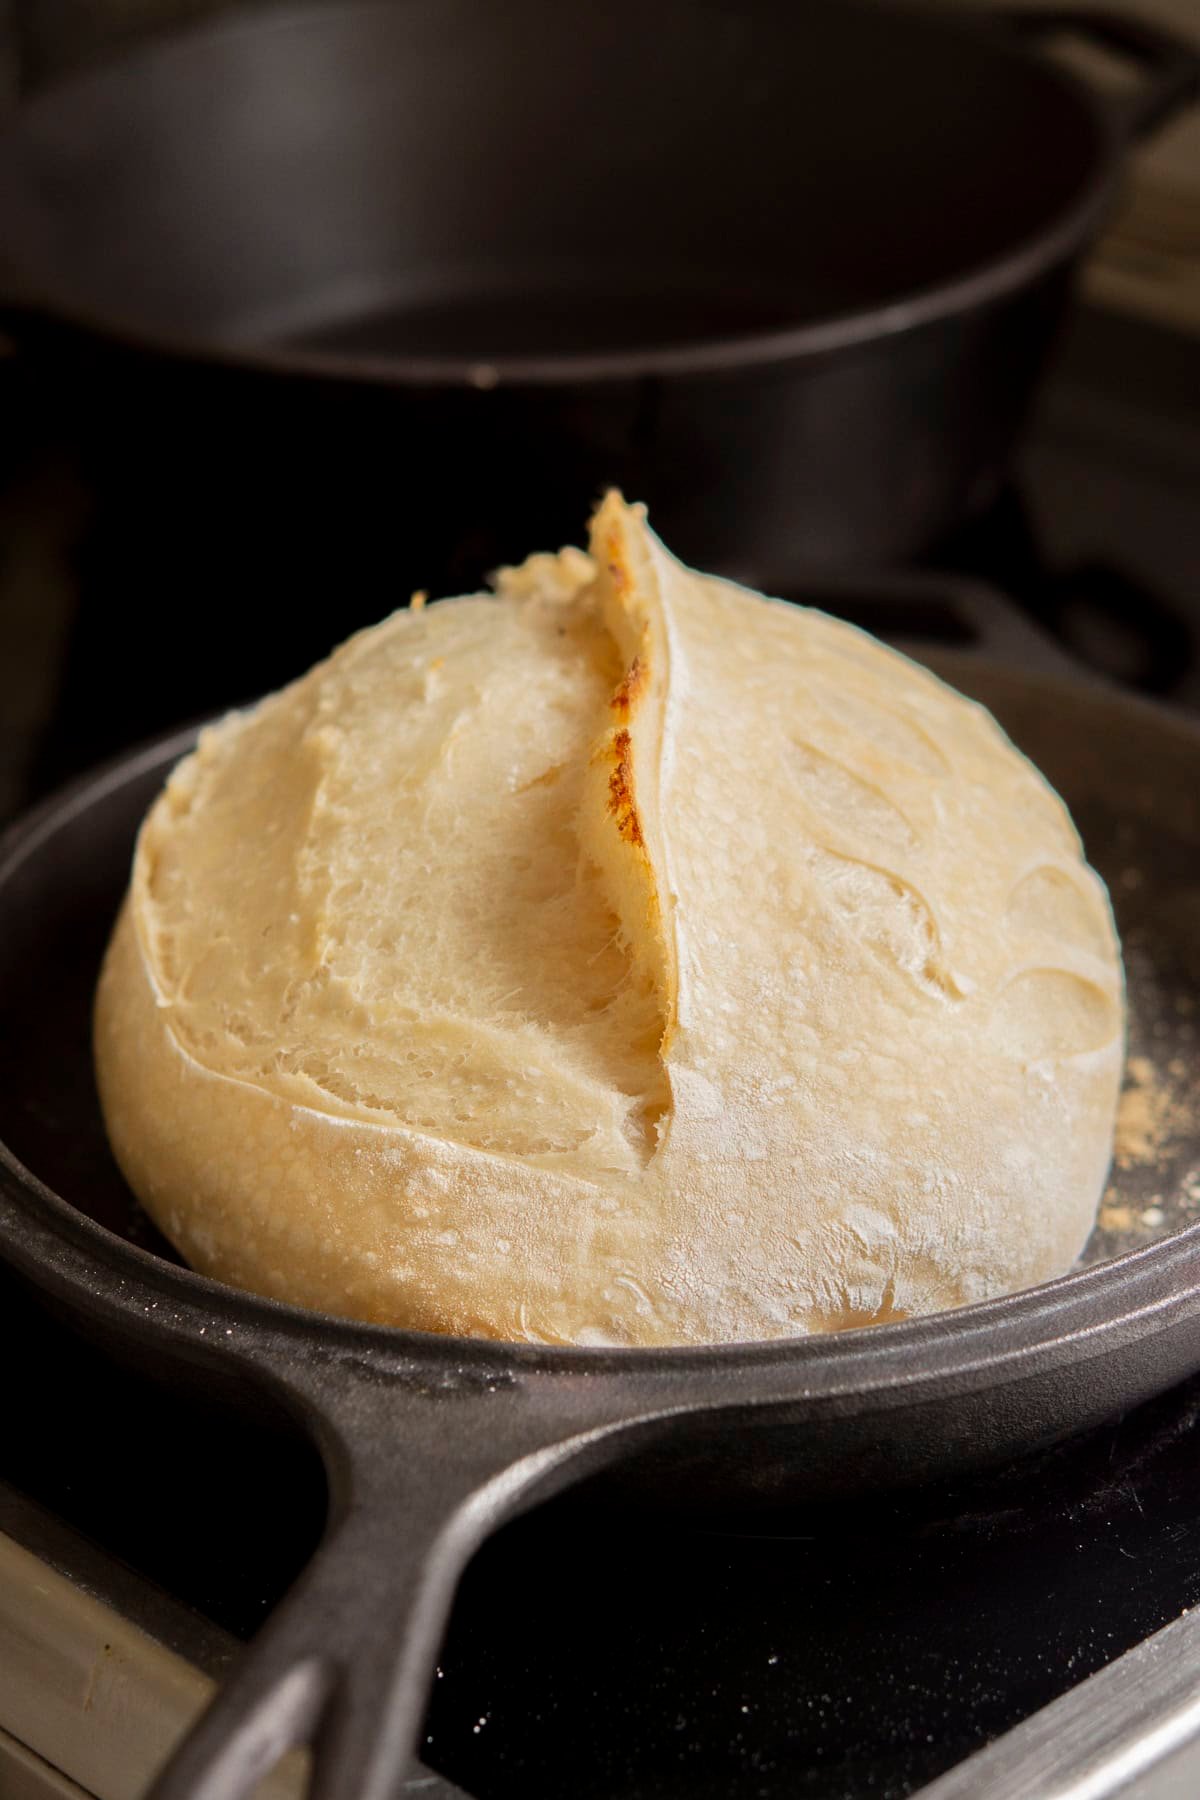
Photo credit: Homegrown Happiness
Bake covered for 20 minutes, then remove the lid, lower the heat to 450 degrees, and bake 20 to 25 minutes more. Aim for a deep golden brown crust.
Step 10, Cool Before Slicing

Photo credit: Homegrown Happiness
Let your loaf cool for at least one hour before cutting. Inside, steam is still finishing the crumb, so patience pays off with a better texture.
For the original step by step method with more tips, visit Homegrown Happiness.
Beginner Tips
- Use starter at its peak, roughly 4 to 8 hours after feeding
- Watch the dough, not the clock, during bulk rise
- Wet your hands to handle sticky dough with ease
- Bake a slightly darker crust for the best flavor
Wrapping Up
Your first sourdough loaf is a skill you will use for years. Follow these steps, take notes on timing, and each bake will get better. Need a starter first? Read our guide on how to make a sourdough starter from scratch and pin this recipe for baking day.
How did your first loaf turn out? Share your results in the comments below!